
How to: Migrate from SpecFlow to BDDfy9 min read
I’ve been using SpecFlow for many years and it has definitely been a trusty ally, but recently I’ve been getting increasingly frustrated with it. Some regular frustrations include:
- no IntelliSense when writing scenarios
- “ambiguous step definitions” errors when multiple steps share the same title
- having to clear my %temp% directory whenever it has a nosebleed and can’t bind my steps to my feature files
- no inbuilt reporting – why do I need to configure Pickles as well as SpecFlow?
- limited control over execution, meaning I have to jump through hoops to pass parameters and share values between steps
- and the straw that broke the camels back – no support for .Net Core!
So last week I began researching some alternative .Net BDD libraries and stumbled across BDDfy (formerly BDDify) and I decided to give it a whirl. Below I have documented the steps I took to convert an existing test suite from SpecFlow to BDDfy and some of the lesson I learned along the way.
Note that I am using NUnit as my test runner, but the same should apply if you’re using xUnit or MSTest. I took the approach of trying to prevent the project from reporting errors to allow you to safely refactor. I’m sure I failed in this attempt but would love you hear your comments.
Unpicking SpecFlow
1. Removing SpecFlow hooks
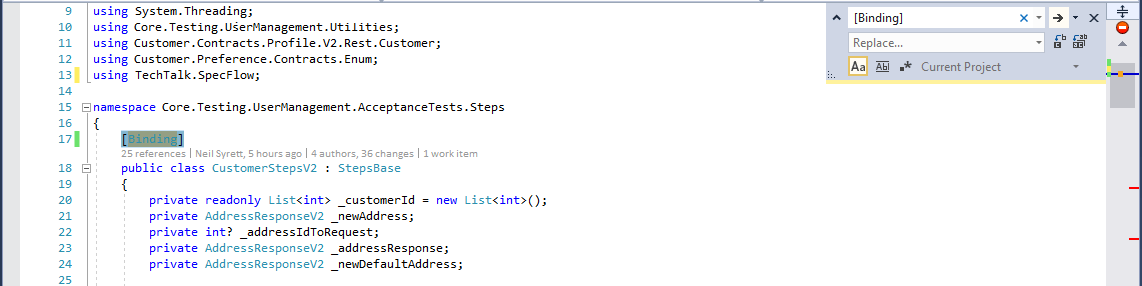
Begin by removing any of the SpecFlow attributes which are not supported by BDDfy. These include [Binding], [BeforeScenario] and [AfterScenario]. The full list is available here: https://specflow.org/documentation/Hooks/
You should be able to remove each of these with a simple Find and Replace (leaving the Replace field blank).
Depending on
If you are using Step Argument Transformations, you will also need to delete any [StepArgumentTransformation] attributes.
Do not remove your [Given/When/Then] attributes as these are also supported by BDDfy and are used to generate the report.
2. Removing multiple step attributes
BDDfy cannot support individual step methods being decorated with more than one [Given/When/Then] attribute. If you use this technique then the simplest solution is to duplicate the step method – once for each attribute. This may not be the most elegant solution, but we can always refactor it later.
3. Replacing ScenarioContext
If you’re using ScenarioContext.Current then you should take a long hard look in the mirror! Using a static, generic repository is a pretty dirty way of storing and sharing values. It also prevents your tests from executing in parallel. But, if you are using it there is a simple (yet equally dirty) solution.
Begin by creating a new class called StepsContext or similar) and add a public property of type Dictionary<string, object> and call it Current.

Now for each of your Steps classes, add a constructor and pass it your StepsContext as a parameter and store the object as a private field.

With a quick Find and Replace you can now replace any references to ScenarioContext.Current with your new context object.

In addition to ScenarioContext.Current, you may also need to migrate away from using certain other properties of the ScenarioContext object. For example I was using ScenarioContext.Current.TestError to post events to SauceLabs when a test failed. To resolve this I am now using the NUnit equivalent TestContext.CurrentContext.Result.Outcome.Status. The same goes for FeatureContext.
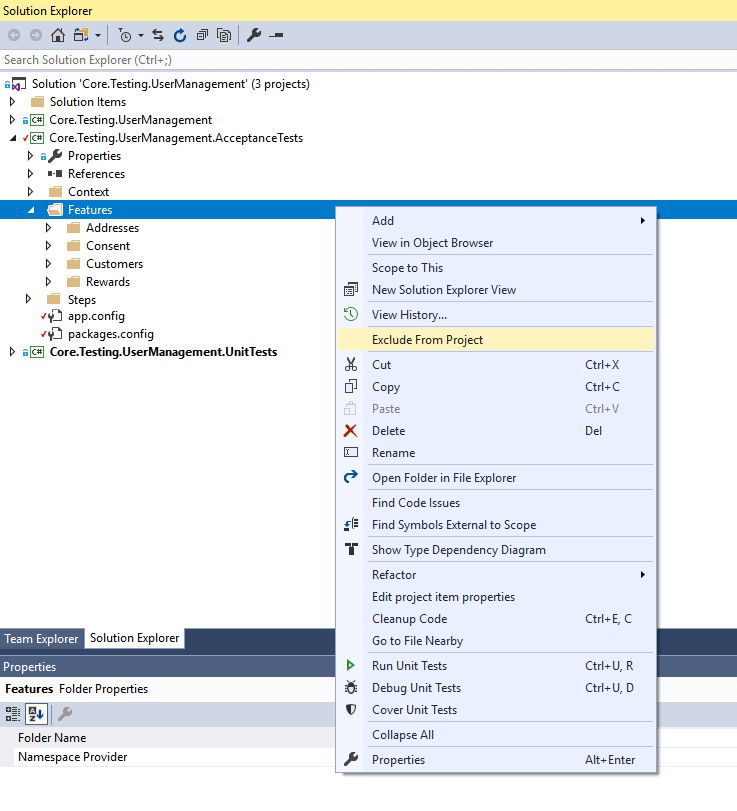
4. Excluding feature files
Feature files are not supported in BDDfy so will now have to exclude them from your project to stop Visual Studio from throwing a strop later on.
Installing BDDfy
5. Replacing SpecFlow with BDDfy
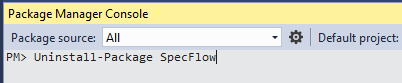
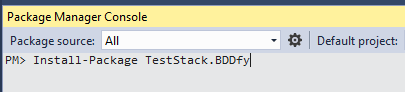
You should now be ready to say goodbye to your old friend SpecFlow and say hello to your new best friend BDDfy! Run the following commands in your Package Manager Console:
Uninstall-Package SpecFlow
Install-Package TestStack.BDDfy
Having uninstalled SpecFlow your solution will begin to throw a bunch of errors where it is still referenced. You can solve this by replacing “using TechTalk.SpecFlow;” with “using TestStack.BDDfy;”.

With any luck at this point, you should be able to build your project without errors. The test explorer will no longer show any tests so now we need to begin migrating the feature files over to BDDfy.
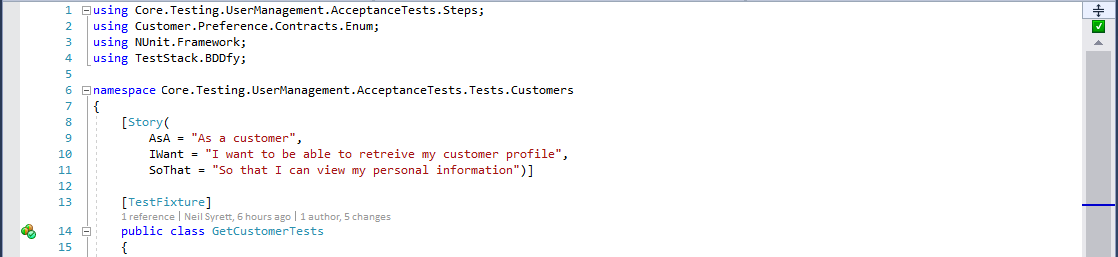
Instead of feature files, BDDfy uses vanilla unit tests to define each scenario. So begin by creating a new class to replace each of your feature files. I am using NUnit so I have decorated my classes with the [TestFixture] attribute.
You can then add a [Story] attribute to describe the feature under test. This can be copy and pasted from your feature file.
Note that BDDfy uses the As a, I want, So that construct, whereas features in SpecFlow are described using In order to, As a, I want. This will force you to rewrite your scenarios to fit the new format, but it is possible to extend BDDfy to define your own language if you are determined to stick with the same format.
7. Instantiating step class
One of the nice features of BDDfy is that it puts you in full control. This means you are free to use a dependency injection framework to simplify and centralise your object construction. For this example, however, I have kept things even simpler and opted to “new up” my steps classes in the constructor of the test class.
If you are using Context Injection or you replaced ScenarioContext.Current by following Step 3, you will now need to supply the class with the relevant parameters, as shown in my example.

8. Creating BDDfy scenarios
You’re now ready to begin writing your scenarios. Create a method with the name of your test (BDDfy understands PascalCase and will automation split each word when generating the test report). Like a unit test, you will need to decorate your method with the appropriate attribute [Test], [Fact] or [TestMethod]. You can then use BDDfy’s Fluent API to call each of your steps in turn. The final step is to append the call to BDDfy() itself, to instruct BDDfy to execute the test.

Your project should now build and your test should display in the test runner. Now run the test and see if it passes.
9. Passing step parameters
Some of your test steps may require parameters. In this case, you can simply pass the required parameters directly to the step method. If you have created Step Argument Transformations you can call these methods directly to make use of your custom conversion. However, I suggest just passing the parameters directly and cutting out the intermediate step where possible.
If you are using tables there is no built-in solution from BDDfy. Optionally you can choose to pass the parameters to the step individually. However, if you have a particularly complex table you may wish to define a custom class to hold of the various properties and pass this to the step instead.
10. Migrating scenario outlines
If you are using Scenario Outlines and Examples to data drive your tests, these can be migrated to NUnit [TestCase] methods. This would be [Theory] in xUnit or [DataRow] in MSTest. At this point, you may also want to utilise your Step Argument Transformations if you need to construct more complex parameters.

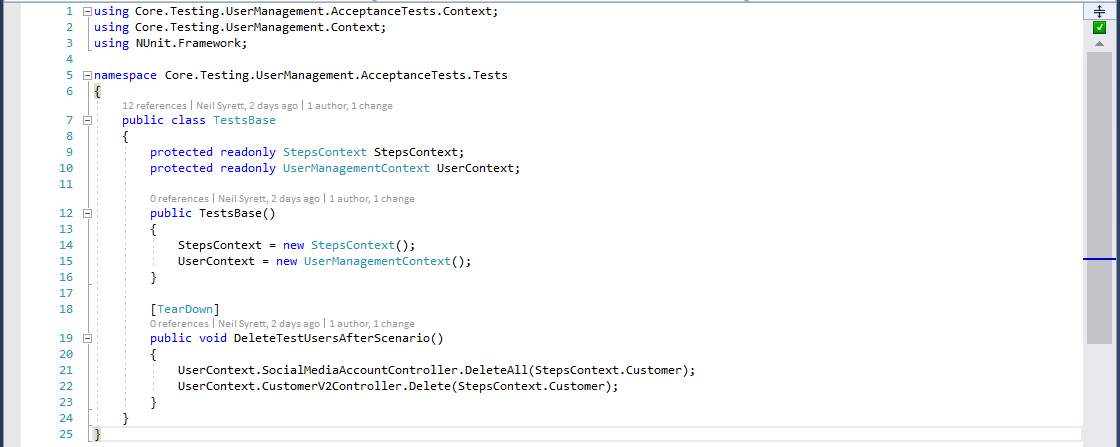
11. Defining start up and tear down
SpecFlow has the ability to run setup and tear down routines at various points in the lifecycle of the test suite. Depending on your choice test runner you will be able to map your existing setup and tear down logic as required.
In my instance, I was using [AfterScenario] so I have replaced this attribute with the NUnit equivalent, [TearDown]. In order for NUnit to run this method after test execution, I also need to move this method into my test class. However, since I want to run the same teardown method after every test, I have chosen to place the method in a common base class. This avoids me from having to duplicate the code in every test class.
Additionally, if you are using background steps you can call these steps directly from a setup method. However, if you would like the steps to appear in the test report, you will need to include these steps in the test methods themselves, before the first Given method is called.
Test Reporting
12. Formatting step definitions
Up until this point, we have not made many changes to the step classes themselves. This is because of the [Given/When/Then] attributes are common to both SpecFlow and BDDfy. So once the references were swapped in Step 5 they switched to the BDDfy attributes. While SpecFlow uses these attributes to translate between feature files and the step implementations, BDDfy does not require them for this purpose. Instead, BDDfy uses these attributes to generate an HTML test report after the tests are run. In order to ensure the step are formatted correctly in the test report, there are a few tweaks we will have to make.
Firstly we will need to replace any wildcards with the the C# composite string formatting mask, {0}. This will allow BDDfy to substitute the parameter values into the step description when generating the report.

Then we will need to remove the @ symbol from before the text string. A simple Find and Replace can be used to achieve this.
13. Generating the report
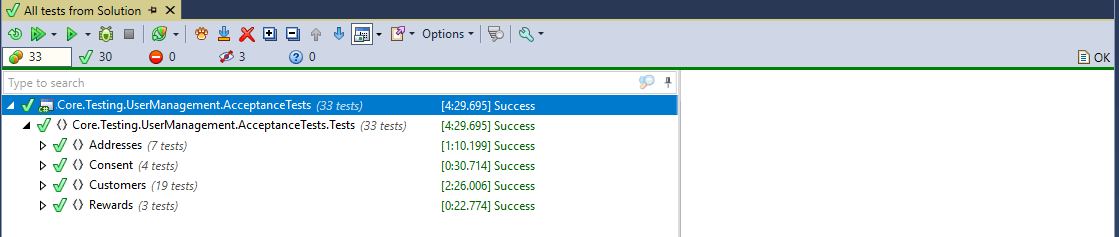
At this point, you should be able to build your project and run your tests. With any luck, you should have a full set of passing tests!
After running your suite of tests, navigate to the bin directory of your project and locate BDDfy.html. Open the file in your web browser to view the auto-generated test report. Should any of your tests fail these will be displayed at the top of the report for easier investigation.

Since I am running my tests in TeamCity, I have chosen to publish my test reports in an Acceptance Tests tab on the build results page.
Conclusions
BDDfy provides a clean and straightforward method for orchestrating tests while maintaining the benefits of describing tests in Gherkin. It also eliminates some of the common frustrations I have often encountered with SpecFlow, such as decoupled bindings, lack of control over class instantiation and lack of support for .Net Core.
The main benefit, however, is the speed with which you can write tests. No longer are you forced to search through your step definition classes, or copy and paste code. Instead, you can leverage the power of IntelliSense to construct tests and maximise your code reuse.
Overall I’ve been very impressed with BDDfy and will definitely be using it going forward and encouraging my colleagues to try it too.
BDDfy looks good. Great job in documenting your implementation and glad to see it working on the CI pipeline.
Thank you for your post, I am getting feed up with SpecFlow and it’s all too frequent condition of tests missing from Test Explorer.
Hello! What about feature file or its alternative? It is very useful for me to collaborate with non-tech customers and stakeholders.
Hi Sergey, BDDfy takes a slightly different approach to the feature files of SpecFlow. Instead BDDfy generates an HTML report of your features/scenarios after execution. For me this achieves the same thing – a living document of features written in a business language – which enables the communication with stakeholders.